"Absence, Hear Thou My Protestation"

7:34 PM Emily Reginalds 0 Comments


Well, this one has been a long time coming. I think I started this in late August, put it away for a while, and picked it up again just recently. I had already finished the bulk of the work, I just hadn't found the time between other projects and school/work to do all the remaining detail work. Claire's riding jacket in Outlander has always been one of my favourite costume pieces of the series. Caitriona Balfe looks stunning in everything, but she's particularly radiant when wrapped up in luxurious white furs and what I'm guessing is a brown tweed fabric.

I had very limited fabric for this project. The brown tweed was $20 per metre from a small fabric store in Oakleigh, so I only bought two. And the fur was hideously expensive - even when on sale at Lincraft - so I only bought one metre of that. It meant my sleeves came up a bit short, the hood isn't nearly as roomy as I would have liked, and the fur isn't as luxurious and overpowering as it was in the series. But I don't mind. Making costumes on a budget is so much more challenging and means I don't want to claw my eyes out every time I look at my bank balance.

I always knew that I wasn't going to find a pattern for this costume, but I was lucky enough to find one on eBay that was similar enough to work as my base pattern. It was Sew & Sew B5446. It doesn't have a hood, the sleeves are bell sleeves, and the collar is just extremely unhelpful. All I took from the pattern was the bodice - and even that still required customization. The best way to do this is to just copy the pattern onto some fabric and then make all of your adjustments on a dress form. The sleeves and hood were taken from two other patterns and the peplum was made like a circle skirt.

Putting the pieces together from there was all very straightforward. I put some box pleats into the back and sides of the peplum before attaching it to the bodice. I don't think there's any pleats in the top of the actual costume, but I put some in the bodice of mine anyway. The hood presented a bit of a problem. I didn't have enough fabric to make it one piece, so I cut two. But then it wasn't big enough, so I used what little fabric I had left to make another piece for the underside of the hood. It looks a lot better with the fur attached, although I'd still love to go back and remake the hood later so that it has a more natural shape.

The lining was where I hit a roadblock. I would like to say that I was too busy with my new job and other projects, but mostly I just lost interest. The lining pieces were cut from a plain brown cotton when I started the project and needed to be hand stitched to the bodice, sleeves, and peplum. The difference it made to the peplum is miraculous. It used to be so limp when put on over a bum roll and petticoat, but now it flares out! Just the way I wanted.

After the lining, all that was left were the buttons and fur. And let me tell you something about fur. It sheds. It sheds everywhere. No matter what you do, no matter how you cut it - it sheds. I knew it was going to be an issue when I purchased the fur back in Sydney, so I decided to line it as well with a white cotton before hand sewing it to the hood and sleeves. It was still messy to cut and sew, but at least it won't shed every time I put the jacket on.

And that's it! All done! I can't wait to share my next Outlander costume with you all - hopefully next time it won't take as long.

0 comments:

"What's your name, darling?" "Captain."

3:02 PM Emily Reginalds 0 Comments


I would apologize for not posting anything in such a long time, but then I would probably have to do that every time I post something. Life is just too busy! Usually when I complete a project - it's under extreme pressure and in only three or four days. I was hand sewing my Starfleet uniform hours before I had to board my flight to Sydney for Oz Comic Con. I just never have the time until the week before a costume needs to be finished - when I'm forced to neglect my obligations and put all of my energy into that costume.


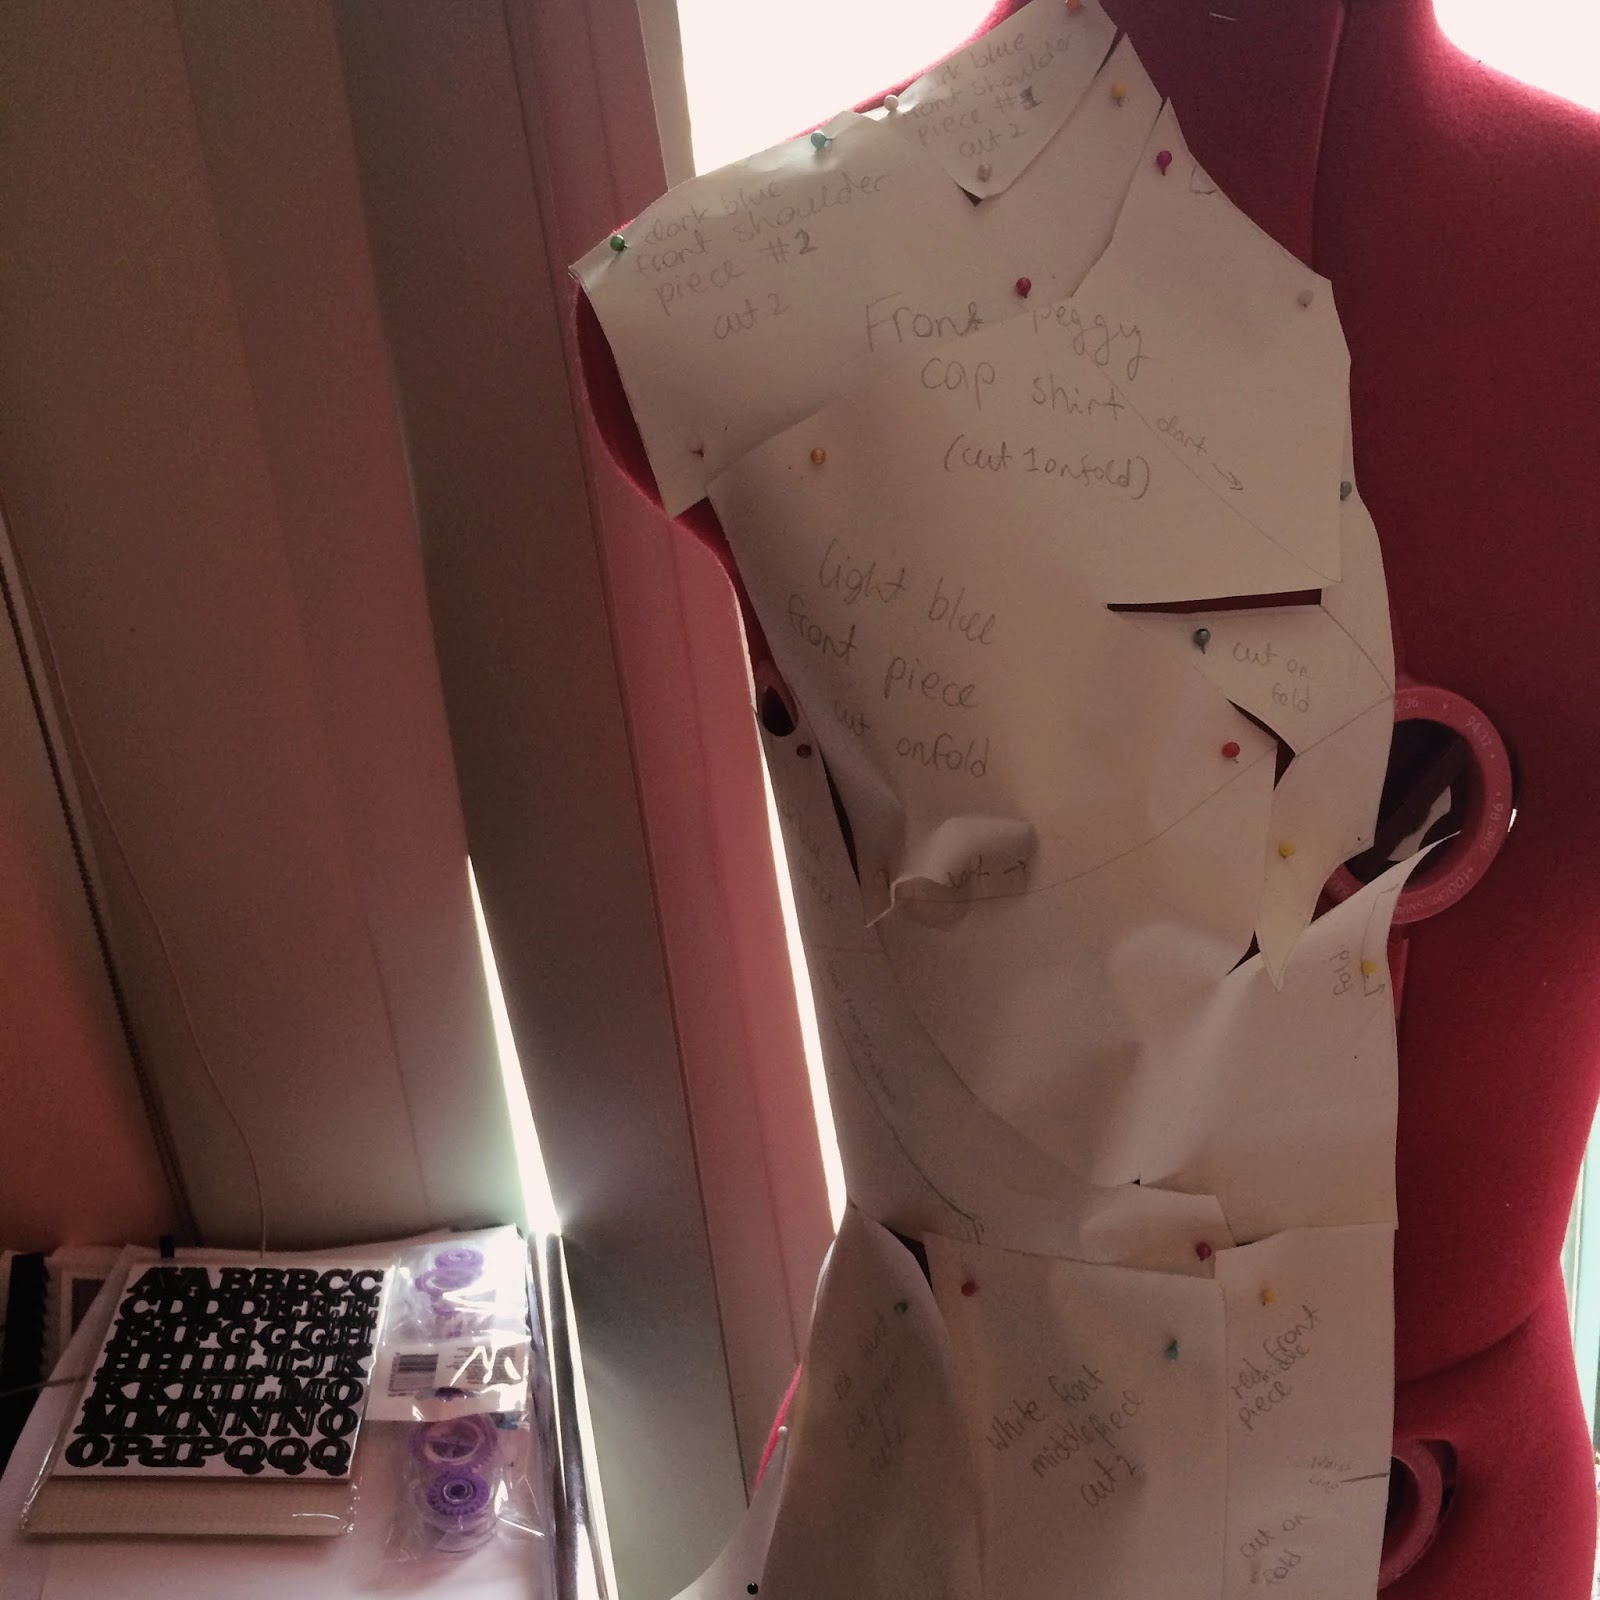
My Captain Peggy Carter costume is no exception. I think I made the pattern in a couple of hours and then worked on the costume non-stop the week after that. It wasn't stressful, though, which is a rareity. I learnt a lot while making this costume and it is the last one I made before finally picking up my overlocker. This costume just felt like a huge stepping stone in my journey to becoming a better seamstress, so I wanted to document it here.

I knew going into this that I wanted the costume to be more inspired by Steve Rogers' Captain America than the Captain Carter we see in Marvel's Puzzle Quest. Although the latter has a lovely and unique design, I wanted to go with the more easily recognizable costume - especially as I'd be premiering the finished product at Melbourne's biggest convention of the year.


The final design is mostly inspired by Steve's outfit when he rescues Bucky and his regiment in The First Avenger. This was half because I liked the grittiness and reality of it and half because I didn't actually have enough time to make a matching pair of blue trousers.


I copied a long sleeve shirt pattern onto some drafting paper and then added in all the patches and designs and bits and bobs. In the end, there was a ridiculous amount of pieces in the top half of the shirt. It wasn't necessary - I could have just made them patches and sewn them onto one single main piece. But it's a bit late for that now, innit? Anyway, the pieces that are sewn into the sleeves and bodice, rather than attached as patches, have a raised look that gives the illusion that I am actually muscular. And I wouldn't be Captain America without those.


There was so much customizing of this piece. I wanted it to be as fitted as possible, but it always somehow ended up loose in some places. It's my own fault, really. My first few projects when I originally discovered sewing ended up too tight to wear, so now I overcompensate my seam allowances in the hopes that I won't make the same mistakes again.


I got the length of the zip wrong and had to run out to Lincraft and buy one that I could sew into place at uni. It still wasn't the right length and falls short at the neckline, but - as usual - I didn't have time to make adjustments so that it would be the right length. It was actually my first time using an open end zip which is now a very close contender for the title of My Favourite Zip Ever. I'll definitely use it again on one of my next costumes.

Photo by Ganjaninja Photography
Of course I'd love to make this costume again, especially now that I have my overlocker. I'd also love to make other versions of Captain America - especially his USO costume from TFA, complete with his original shield. But this one will do very nicely, until then.

Photo by Kitt Photography
You can find more photos of the costume in action on my Facebook page!

0 comments: